EN


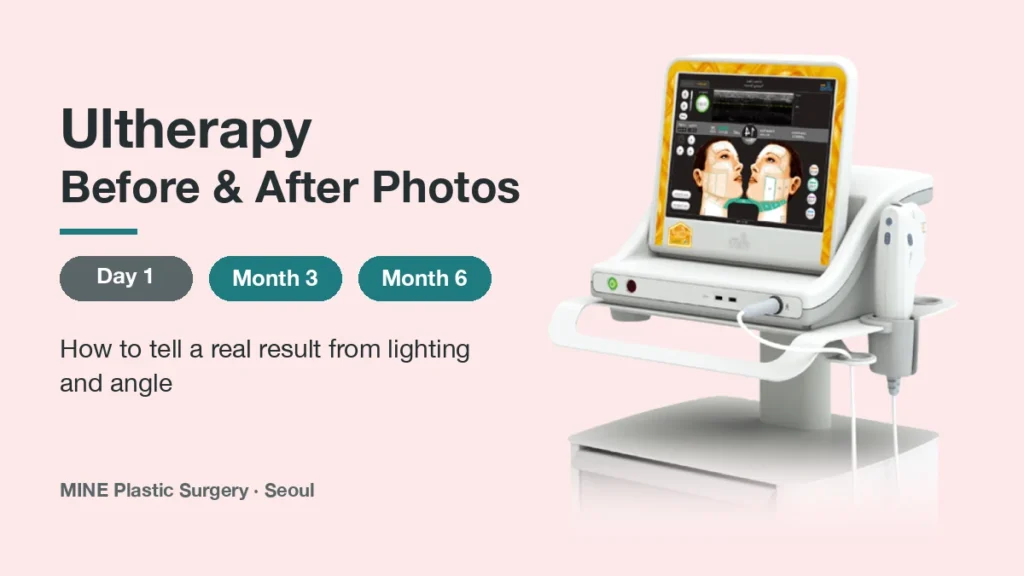
Ultherapy before and after photos are side-by-side images taken before treatment and weeks to months afterward, and they only show a real result when both shots are taken at a fair time point — usually 3 to 6 months later — under the same light, angle and expression.
So when you look at any set of Ultherapy before and after photos, ask two questions. When was the after photo taken? And were both photos taken under the same conditions? A Day 1 photo mostly shows swelling, not lifting. A Month 3 or Month 6 photo with matched lighting and head position is the one worth judging.
I am Dr. Lee Sung-wook, a board-certified plastic surgeon at MINE in Seoul. In consultation, two questions come up again and again: “My face looked tighter the day after — was that the result?” and “A week later it all went away — did the treatment fail?” Both come from reading photos at the wrong time.
This guide explains what normal Ultherapy before and after photos look like at each stage, how lighting and angle can imitate a lift, and a checklist you can use on any photo set, including your own.
What Ultherapy Before and After Photos Can — and Can’t — Show
Before you judge any Ultherapy before and after photos, it helps to know what the treatment does inside the skin. That decides how large a visible change can be, and how slowly it appears.
How Ultherapy Changes the Face From the Inside
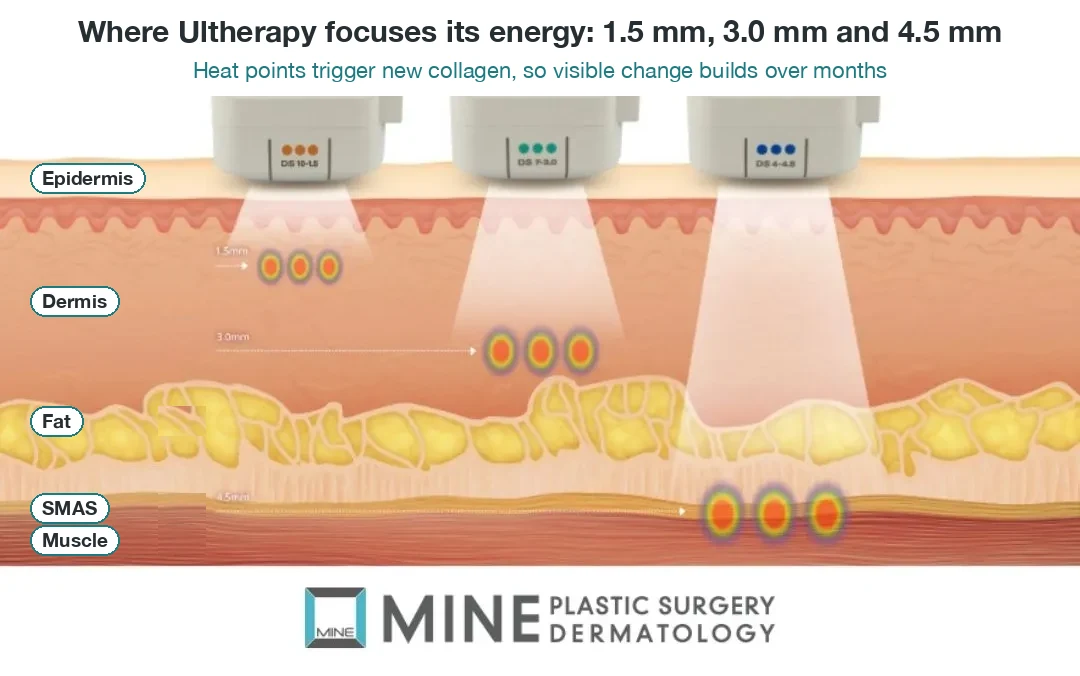
Ultherapy uses microfocused ultrasound with visualization, often shortened to MFU-V. In plain terms, the device shows a live ultrasound picture of your skin layers, so the doctor can see where the energy will land. It then sends focused ultrasound to tiny points under the surface.
Plastic surgery textbooks describe these points as reaching about 65°C (149°F) inside the dermis (the deeper, supporting layer of skin) and the SMAS (the thin muscle-and-fascia layer that holds up the face). The outer skin surface is spared. The built-in imaging can see tissue down to a depth of about 8 mm.
Each heat point is a small, controlled injury. The body responds by building new collagen, and textbooks note that the lifting response depends partly on this fresh collagen production. That is why the result is not instant. It builds gradually over months as new collagen firms and supports the tissue.
Why a Real Change Is Often Only a Few Millimeters
This is the most important point for anyone comparing photos. In one standardized-photo study of 35 patients, blinded physicians rated 86% as improved, with an average brow lift of about 1.7 mm. That is a real, measurable change, but it is measured in millimeters.
A change of one or two millimeters is easily smaller than the difference a lamp, a camera angle or a slightly raised chin can create. In these comparisons, the photo conditions can therefore look bigger than the treatment itself.
Medical textbooks are also clear that non-surgical options do not produce the same change as facelift or neck lift surgery, so a dramatic-looking Ultherapy photo deserves a closer look.
Ultherapy Results Timeline: What a Normal Photo Looks Like at Each Stage
Timing is the first filter for reading Ultherapy before and after photos. The table below follows the timeline I explain to patients, matched to the time points used in published studies. How fast each stage arrives varies from person to person.
| Time point | What you may see in photos | How to read it |
|---|---|---|
| Day 1–3 | Mild redness, swelling, tenderness, a temporary tight look | Not the lift — heat-related swelling usually settles within a few days |
| Week 1 | Swelling fading; the face may look “back to before” | Too early to judge lifting |
| Month 1 | Subtle firmness, little visible difference | Normal — collagen is still building |
| Month 2–3 | Jawline and cheek contour start to look cleaner | First fair comparison point (around 90 days) |
| Month 3–6 | Remodeling continues; the clearest change is usually around Month 6 | The fairest comparison (around 180 days) |
| Month 9–18 | The result holds, then gradually softens | Many people discuss a repeat session around 12–18 months |
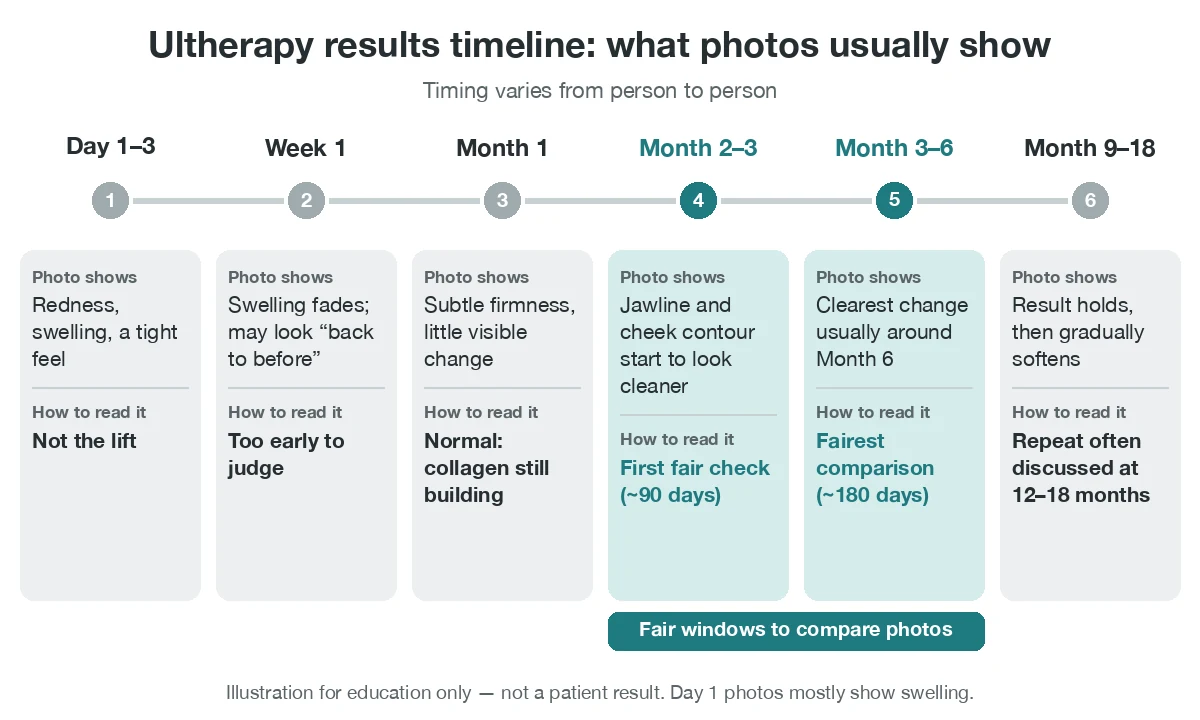
Day 1–3: Redness, Swelling and a Tight Feeling Are Not the Result
On Day 1 after Ultherapy, photos often show mild redness, some swelling, tenderness to the touch and a tight look. Plastic surgery textbooks report that the most common side effect is brief discomfort during the session. Other reported effects include temporary redness, swelling and occasional bruising, which usually settle within days.
Any tightness in a Day 1 photo is most likely a mix of heat-related tissue contraction and swelling, not the final lift. That is why photos labeled “immediately after” can mislead. If redness, swelling or numbness lasts longer than you were told to expect, contact the clinic that treated you.
Week 1 to Month 1: Why It Can Look Like Nothing Happened
As swelling fades over the first week, many people feel their face has gone back to how it was before. This is normal. The temporary tightness has gone, and new collagen is only starting to form, so photos from the first week rarely show much. Day-to-day care for this period is covered in our Ultherapy aftercare guide.
By Month 1, some people notice that the skin feels a little firmer. In photos, though, there is usually little visible difference yet. After photos that look the same at Month 1 are not a sign of failure.
Month 3 (Around 90 Days): The First Fair Check
Three months after Ultherapy is the first fair time to compare photos. Around this point, many people begin to see a cleaner jawline and a softer transition from cheek to jaw.
In a prospective study of 103 adults, about two-thirds of patients and 60% of blinded reviewers judged the lower face improved at 90 days (Oni et al., 2014). The same study found better results in people with a BMI of 30 or less. Month 3 is a checkpoint, not the finish line, because collagen remodeling is still going on.
Month 6 (Around 180 Days): The Fairest Comparison
Six-month Ultherapy results are usually the clearest, so this is the fairest point to compare photos. Six months after treatment is the most common time point studies use to judge an Ultherapy result.
In a retrospective study that assessed patients at 90 and 180 days, more than 80% reported improvement in the face and neck (Fabi and Goldman, 2014). This was self-reported and looked back at past cases. A randomized clinical trial on upper-arm laxity also followed patients at 1, 3 and 6 months, which shows how standard the six-month mark is in the medical literature.
Month 9–18: Holding, Then Slowly Fading
In my clinical experience, the result usually holds for around 9 to 12 months and then softens gradually as normal aging continues. Many people discuss a repeat session at around 12 to 18 months. This range comes from clinic experience rather than a textbook figure, and it varies with age, skin quality and sun exposure.
Lighting, Angle and Expression: How Photos Can Fake a Lift
Plastic surgery textbooks treat consistent clinical photography as a skill of its own. They group the causes of mismatched photos into four areas: how the photo is taken, how it is published, how it is processed (color, brightness, contrast) and how the patient looks on the day. None of these is the treatment, yet all of them can look like it in a side-by-side comparison.
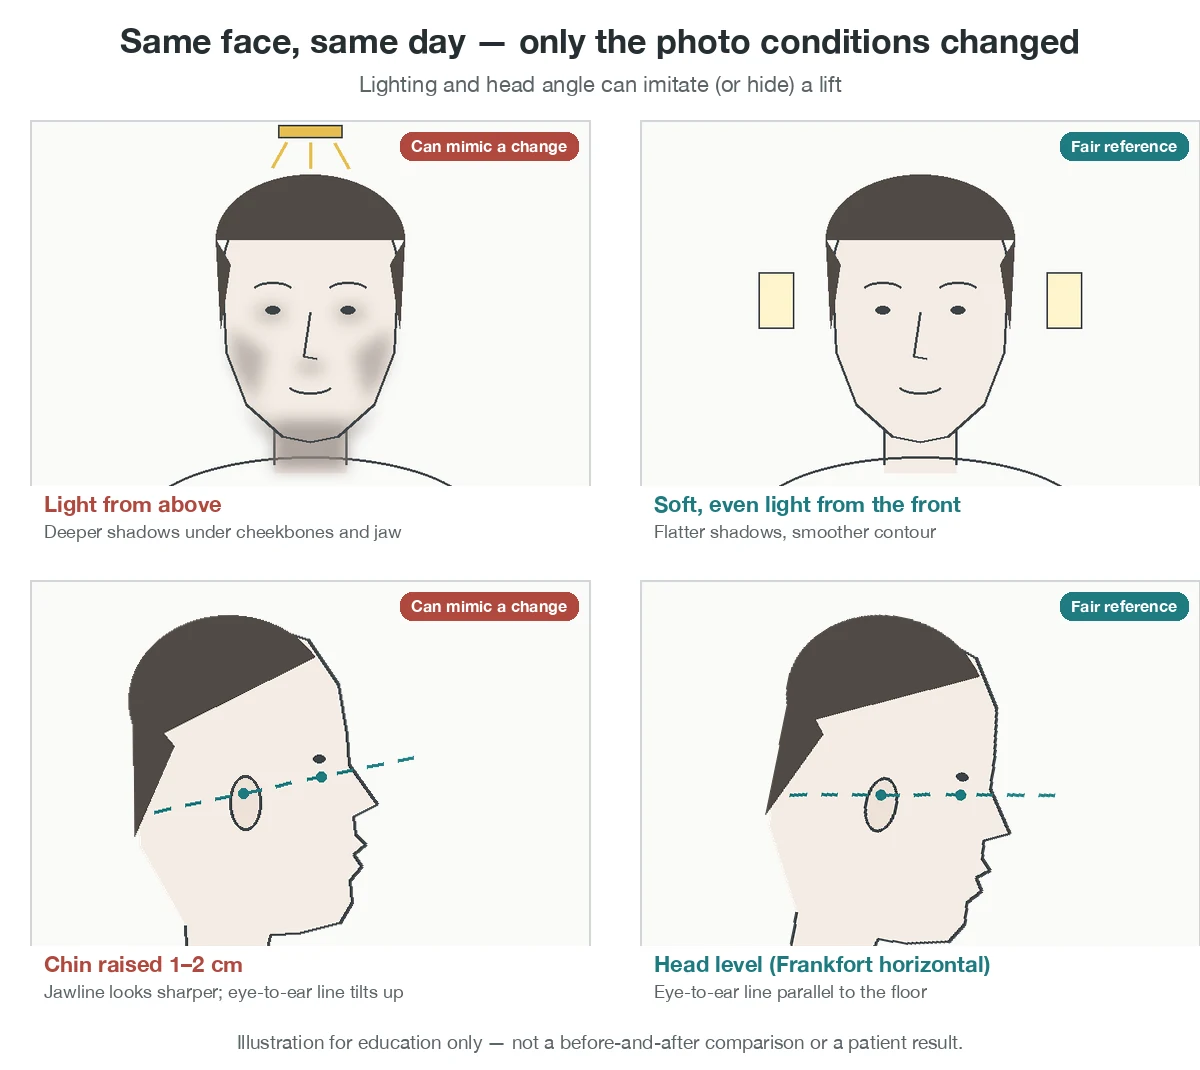
Light Direction, Shadows and White Balance
Light from above deepens the shadows under the cheekbones and along the jaw, so skin looks heavier. Soft, even light from the front flattens those shadows and makes contours look smoother. The same face on the same day can look noticeably different under each, so lighting is the first thing to check in Ultherapy before and after photos.
Textbook photo standards call for even, shadow-free lighting, a fixed white balance and a plain mid-blue or 18% gray background. Automatic white balance and a single on-camera flash can change color and shadows from one shot to the next.
Head Tilt, Camera Height and Lens Distance
Doctors line up front-view photos using the Frankfort horizontal plane. This is an imaginary line from the bony rim under the eye to the top of the ear opening, kept parallel to the floor. Raising the chin by only one or two centimeters can make a jawline look sharper in a photo without any treatment.
A camera held below eye level, held very close or set to a wide-angle lens changes facial proportions: the center of the face looks larger and the jaw looks different. That is why textbooks recommend the same lens, distance and camera settings for both photos.
Expression, Jaw Tension, Hair and Makeup
A relaxed face and a slightly clenched jaw do not make the same photo. Clenching tightens the jawline, and even a small smile lifts the cheeks. Hair tucked behind the ears shows a cleaner jawline than hair worn forward. Makeup, contouring, false lashes, earrings and a high collar all change how the lower face reads.
Weight Change, Water Retention and Swelling
A few kilograms of weight change, or simple water retention after a salty meal or a long flight, can change the jawline more than a millimeter-scale lift. Weight matters in the research too: the 103-patient study above found better results at a BMI of 30 or less. When Ultherapy before and after photos are taken months apart, weight is one of the first things to ask about.
| Factor | What it can make a photo show | How to check |
|---|---|---|
| Light from above vs. front | Heavier or smoother contours | Compare shadow positions under cheekbones and jaw |
| Chin raised 1–2 cm | A sharper jawline and tighter neck | Check the eye-to-ear line in both photos |
| Closer camera or wide lens | Changed facial proportions | Compare head size within the frame |
| Clenched jaw or smile | A firmer lower face, lifted cheeks | Look for a neutral, relaxed mouth in both |
| Hair, makeup, accessories | A more defined jaw and cheek line | Bare face, hair back, same clothing |
| Weight or water change | A slimmer or fuller face | Ask about weight, travel and time of day |
| Filters or editing | Smoother skin, reshaped contour | Look for blurred texture or bent backgrounds |
None of this means a photo is dishonest. Your job as a reader is simply to check that the conditions match first.
A Fair Ultherapy Before and After Photos Checklist
Use this checklist on any Ultherapy before and after photos you see online, at a clinic or in your own camera roll. A fair comparison uses the same light, distance, head position and expression, and is taken at least 3 months after treatment.
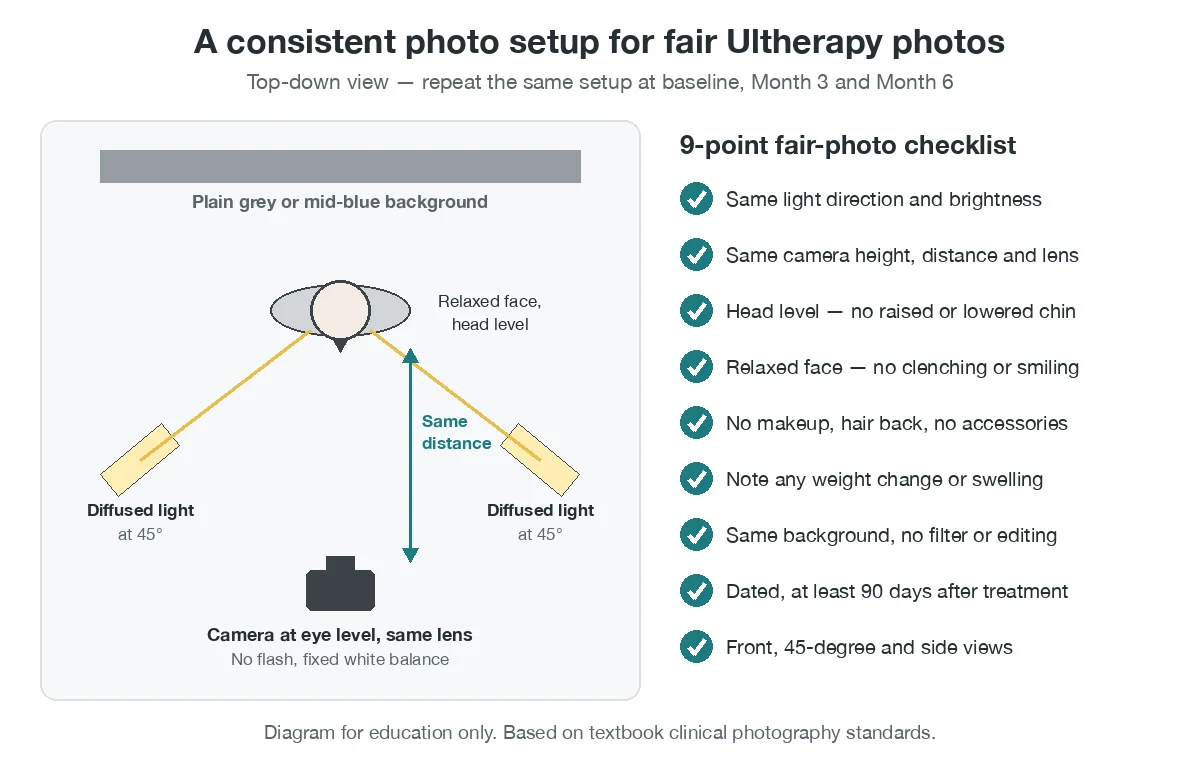
9 Questions to Ask About Any Before-and-After Set
- Lighting – Is the light coming from the same direction, with similar brightness and shadows?
- Camera – Is the camera at the same height and distance, with the same lens?
- Head angle – Is the head level in both, without a raised or lowered chin?
- Expression – Is the face relaxed in both, with no clenching or smiling?
- Appearance – Are makeup, hair and accessories the same, ideally none at all?
- Weight and swelling – Could weight change or water retention explain the difference?
- Background and color – Is the background the same, with no filter or color change?
- Time label – Is the after photo dated, and is it at least 90 days after treatment rather than Day 1?
- Full set – Are front, 45-degree and side views shown for the same person?
Red Flags That a Photo Is Not a Fair Comparison
If you spot any of these in a photo set, treat the comparison with caution.
- No date or time point on the after photo.
- A different background, room or lighting between the two shots.
- Only one view, usually the most flattering angle.
- Very smooth skin, blurred pores or warped background lines that suggest filters or editing.
- A same-day or Day 1 photo presented as the final result.
How to Take Your Own Consistent Progress Photos at Home
Your own Ultherapy photos are often more useful than any online gallery, because you control the conditions.
- Stand at the same window, at the same time of day, with no overhead light on.
- Fix your phone at eye level, ideally on a stand, at the same distance each time.
- Remove makeup, tie your hair back and take off earrings and glasses.
- Keep a neutral face with a relaxed jaw and look straight ahead.
- Take three views: front, 45 degrees and side.
- Repeat the same set at 3 months and at 6 months, and turn off beauty filters.
Who Ultherapy Suits — and When Photos Point to Surgery Instead
Ultherapy before and after photos also help you judge whether the treatment is the right tool in the first place. The amount of laxity in your before photos shapes what a realistic after photo can look like.
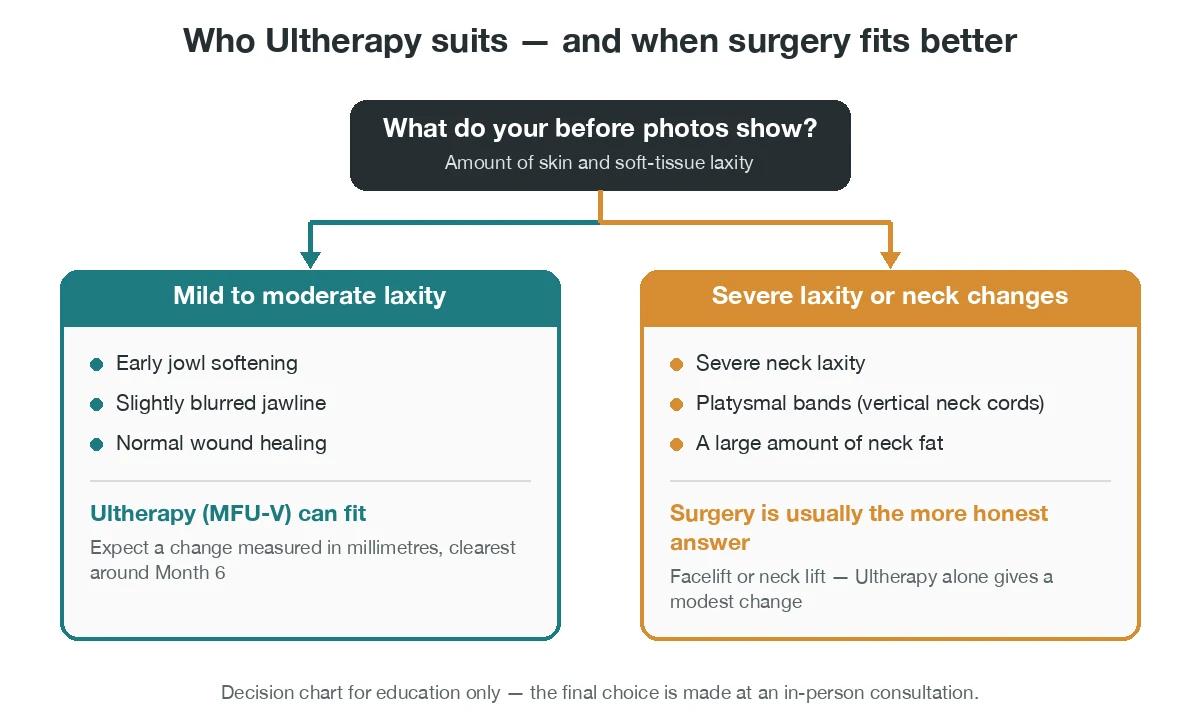
Good Candidates: Mild to Moderate Laxity
According to plastic surgery textbooks, MFU-V suits mild to moderate skin and soft-tissue laxity, and the ideal candidate is relatively young with normal wound healing, because the effect relies partly on new collagen. It does not target melanin (the pigment in skin), so skin tone is less of a limitation than with many light-based treatments.
For readers with Asian skin, a study of 49 Chinese patients treated on the face and neck reported no significant or lasting side effects. One retrospective study also found no link between improvement and age or skin type, although a single study cannot predict any one person’s result.
When Surgery Is the More Honest Answer
Ultherapy suits mild to moderate skin laxity; severe neck laxity or platysmal bands (vertical muscle cords in the front of the neck) usually call for surgery. Textbooks also list a large amount of fat above or below the platysma muscle as a reason to recommend surgery instead.
If your before photos show heavy jowls or a loose neck, expect only a modest Ultherapy change. Surgical photos follow different rules, which we explain in how facelift before-and-after photos differ. Some readers also worry about volume loss in the cheeks; that question has its own article on whether Ultherapy can cause hollow cheeks.
Ultherapy Before and After Photos: Frequently Asked Questions
How long after Ultherapy can I see results in photos?
In Ultherapy before and after photos, most people start to see a difference at around 2 to 3 months, and the change is usually clearest at about 6 months. Speed varies from person to person. Any tightness you see on Day 1 is mainly swelling and heat-related tightening, which settles within days.
What should Ultherapy look like at 3 months?
At 3 months, a slightly cleaner jawline and smoother cheek contour is a normal result. In a 90-day study of 103 adults, about two-thirds of patients judged their lower face improved. Collagen is still remodeling at this stage, so Month 3 is a checkpoint rather than the final result.
Why do I look the same one week after Ultherapy?
Looking the same at one week is normal. The swelling and temporary tightness from treatment day have faded, and new collagen is only beginning to form. Visible lifting usually takes months. For what to do during this period, see our Ultherapy aftercare guide.
How can I tell if a before-and-after photo has been edited or staged?
Compare the lighting, background, head angle, expression, makeup and hair in both shots. Check for a date label, a full set of front, angled and side views, and signs of filters such as blurred pores or bent background lines. If several conditions differ, those Ultherapy before and after photos are not a fair comparison.
When should I take my Ultherapy after photos?
For your own Ultherapy before and after photos, take the first after shot at about 3 months and the final comparison at about 6 months. Use the same window light, phone height, distance, head position and relaxed expression as your before photo. Photos taken in the first week mainly show swelling, not the result.
Planning Ultherapy at MINE in Seoul
The most useful step for your own Ultherapy before and after photos happens before treatment. Ask your clinic for a baseline photo set, with front, 45-degree and side views. Then ask to repeat the same set at 3 and 6 months, under the same light and in the same position. If you take your own, follow the home steps above.
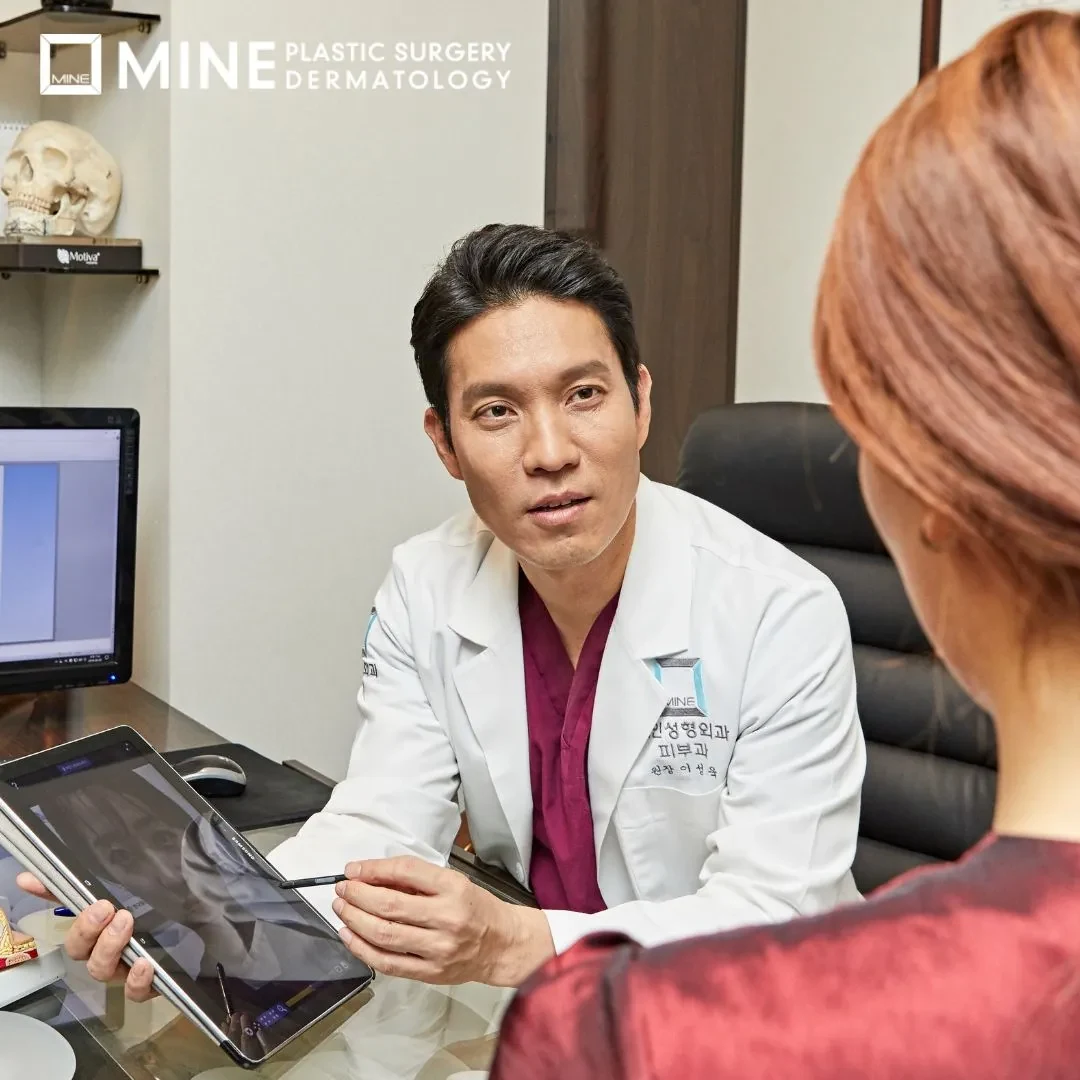
At consultation, Dr. Lee Sung-wook, a board-certified plastic surgeon, examines how much laxity you have. He then explains whether Ultherapy, another lifting option or surgery fits your face and goals, so your expectations match what photos at Month 3 and Month 6 can realistically show.
Considering Ultherapy in Seoul? You can start with an online consultation through WhatsApp or our website form. Recent front and side photos taken in even daylight help Dr. Lee give you more useful advice. Learn more about Ultherapy at MINE.
Written and medically reviewed by Dr. Lee Sung-wook, board-certified plastic surgeon, MINE, Seoul.
※ This content is for informational purposes only and does not replace professional medical advice, diagnosis, or treatment. Individual results may vary, and side effects may occur. Please consult with a board-certified plastic surgeon for personalized advice.